Microsoft has always been trying to provide a great user experience with its different windows versions, you can do multitasking with the ability to run several applications at once and switch between them with relative ease.
In This Article
We will be discussing about how to split screen on Windows. It helps you to see running content of two or more windows screen at one desktop. The trick is used mostly to enhance your productivity as you will be doing multitasking at once.
Microsoft’s latest client operating system, Windows 11 comes with a new feature – snap layouts. It is more convenient feature which is easy to use for all windows users.
In this article, we have planned to show you how to split your screen on Windows by following 3 simple ways.
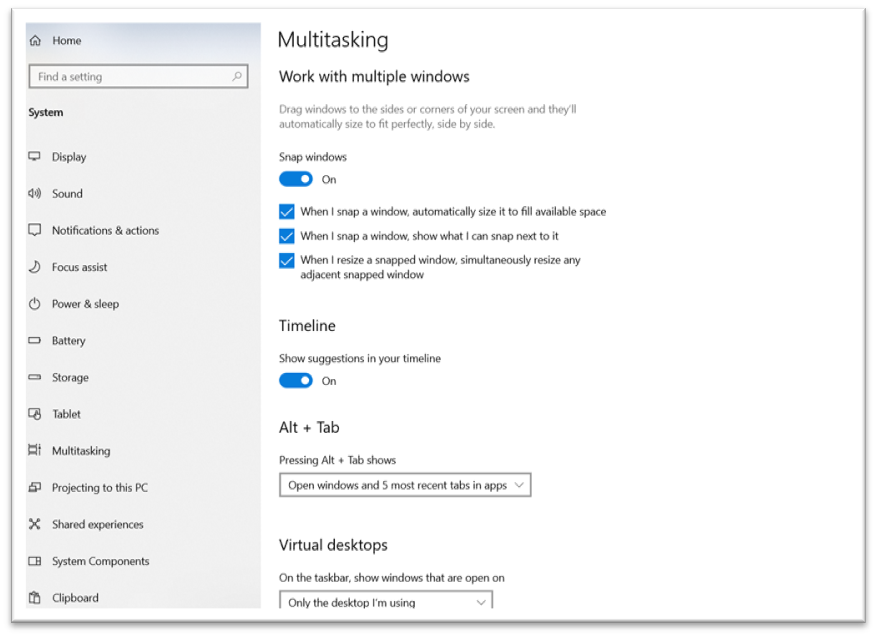
What is Snap windows settings
The feature allows you to position windows in a specific place perfectly, you do not have to change the size and shape of each window manually. It will snaps the window in place, depending on where you drag them. Alternatively, you can use your keyboard shortcuts to move different window around your computer screen.
- Go to windows Settings
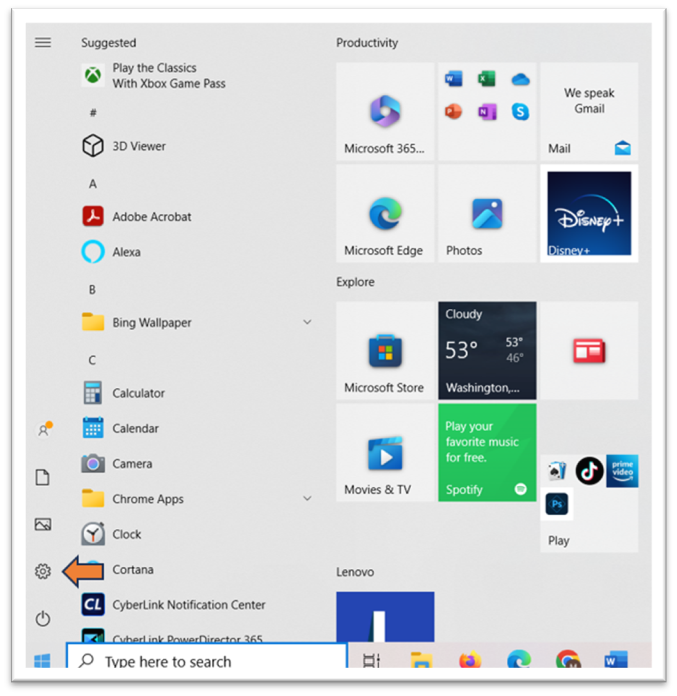
2. Select System
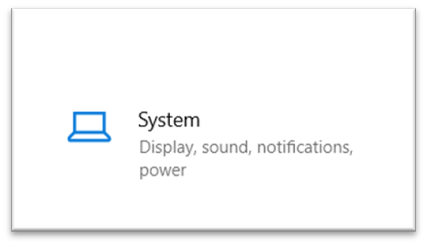
3. Click on Multitasking and make sure that Snap Windows is ON
Let us explore about couple of options by which you can split your screen like a professional.
How to split screen on Windows by dragging
1.Hover your cursor on top portion of a window which you want to split
2. Click and hold the title bar of the desired window. Drag it to the left or right until the cursor reaches the edge of the screen.
3. Release the mouse button when you are ready.
4. Your window will fill half of the screen.
5. Now you can move another window in the same way and continue to do so until you have the split-screen configuration you’re looking for.
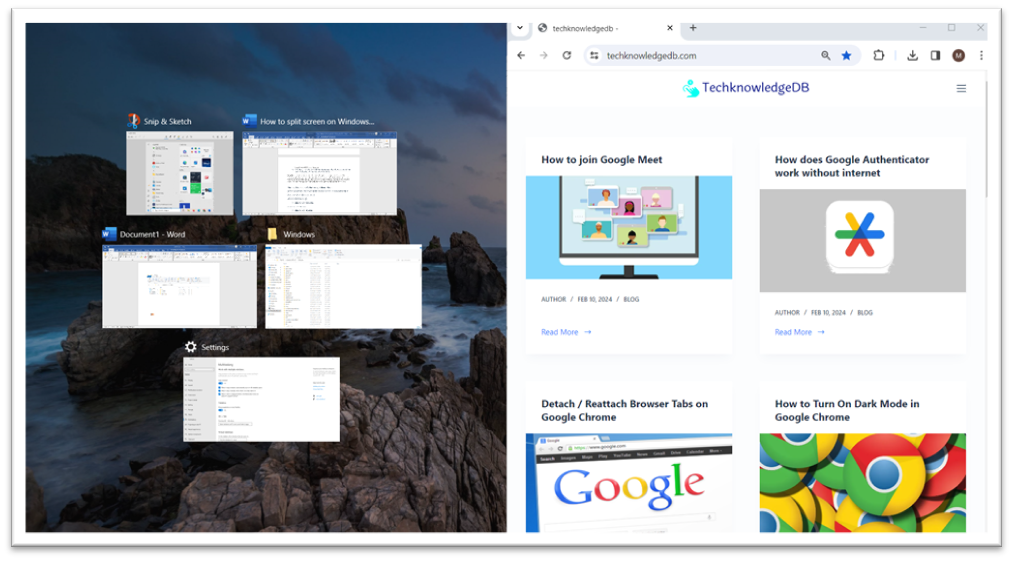
Snap Assist is another feature that will enhance the split-screen experience for you. After snapping a window to one side, Windows will display a series of thumbnails of your other open windows on the opposite side. You can click on the window which you want to fill the remaining space, That’s It!! you have done a perfectly split screen with two applications side by side.
How to split screen on Windows using keyboard shortcuts
Microsoft also gives you another great method to split your screen, using keyboard shortcuts.Select the window which you want to split
- Moves the window to the right
Windows key + right arrow - Moves the window to the left
Windows key + left arrow - Moves the window up
Windows key + up arrow - Moves the window down
Windows key + down arrow
What if you want to split your screen more than two windows. Yes, you have option available on Microsoft Windows
Splitting Screen in 3 involves an arrangement like this –
Select the first window and place it on the left half by holding the Windows key + left arrow.
Next, select the second window, hold windows key, tap right arrow and followed by up arrow.
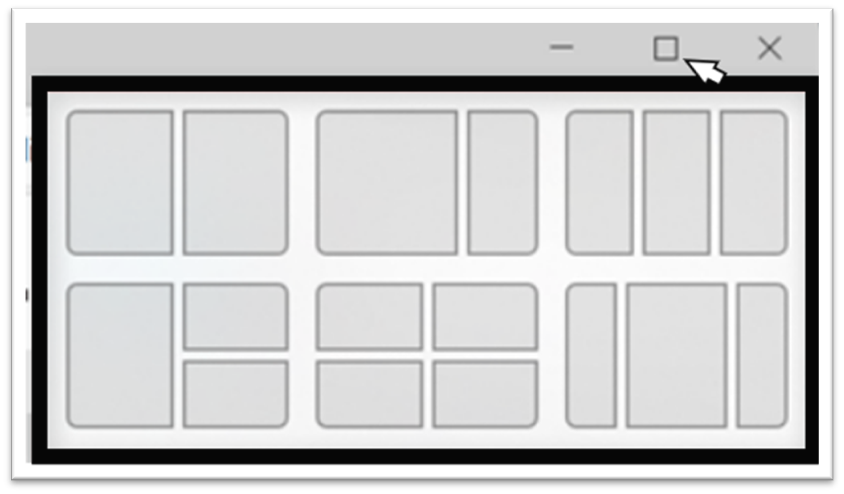
Using Windows in-built split option (Windows 11)
Hover your mouse pointer over the maximize button of the window. You’ll see a variety of snap layout options to choose from.
- Simply select one of the layouts and your screen will be rearranged accordingly.
Conclusion
Hope the above article help you to get more work done without having to switch screens multiple times. Windows has a convenient way to streamline your workflow and boost your productivity with ease. With the Snap feature keyboard shortcuts, you’ll be able to manage multiple tasks side by side efficiently.
Happy Learning !!!!