Greetings, guys!
You might need to take screenshot which have become an essential tool for effective communication, sometime problem-solving and sharing information.
How to take Screenshot on Windows Machine? Let us see some of the easiest process.
Whether you want to capture a hilarious meme to your social network friends, troubleshoot a baffling error message or demonstrate a mind-blowing software feature to your buddies I have planned to share some of the best ways by which you would be able to take screenshots on your windows machine easily
In This Page
The Basics…
What is a screenshot?
- A screenshot is a digital image of what is displayed on your computer screen. Through the click of a button, you can capture and preserve information
Different types of screenshots
- Full-screen screenshots
- Window screenshots
- Area screenshots
Before we jump on our screenshotting adventure, it is important to familiarize yourself with the version of Windows which you are using as screenshot functionalities may vary slightly between versions.
What are 3 ways to take a screenshot on a PC?
Method1: Snip & Sketch
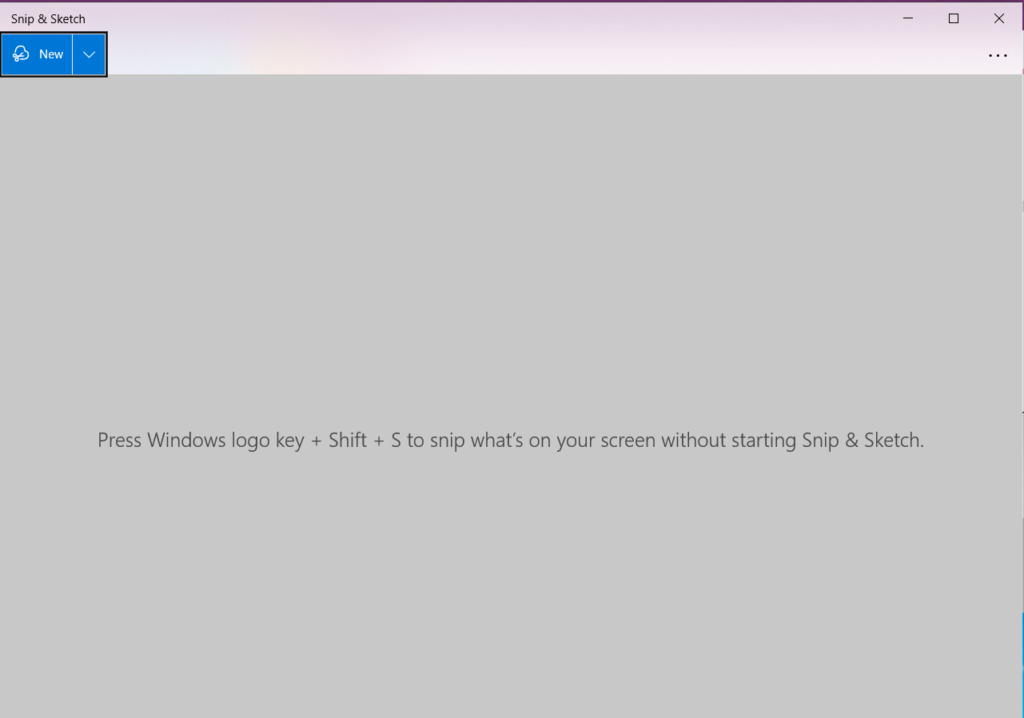
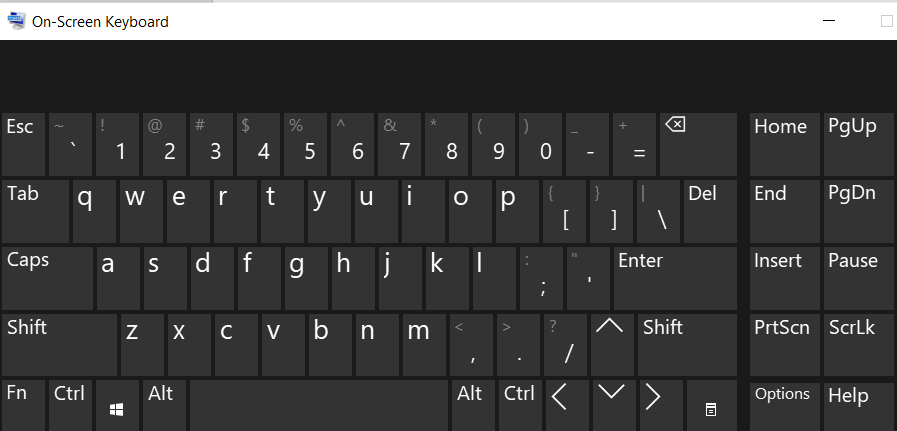
You can open the snip & sketch tool by pressing three key combinations together – Windows+ Shift key+ S
The entire screen light will be dimmed and a small pop-up window will be visible at top center of your screen. This will allow you to choose 4 different ways to capture screenshots : rectangular, freeform, window or full-screen.
Once you take your screenshot, it will be saved to your system’s clipboard and show up as a notification in the lower-right corner of your machine.
If you open Snip & Sketch from start menu, that will open the Snip & Sketch window rather than the little board at the top of the screen. From here, you would like to tap the New button to start a screen capture.

Method 2: Print Screen key (PrtScn)
The Print Screen key or PrtScn (As tech gurus, we love our abbreviations!), this magical key allows you to capture the entire contents of your screen with ease and will be copied to the clipboard.
Alternatively, go to Settings > Ease of Access > Keyboard and toggling on Use the PrtScn button to open screen snipping under Print Screen Shortcut, this will help to open the Snip and Sketch tool once you press the PrtScn Key.

Mathod 3: Snipping Tool
You might come across with a question – How do I take a screenshot on Windows without Print Screen?
Here is the answer –
This tool is there for long time with Windows as a built-in tool. To open the it, you can search in windows search bar.
Click the New button to start the screenshot process. The default type is rectangular, but you are free to change the mode to take free-form, full-screen and window snips.
Again, this will save to your clipboard.

But hold on, there’s more! Let your fingers dance across the keyboard as you become a screenshotting maestro!
Method 4: Game bar
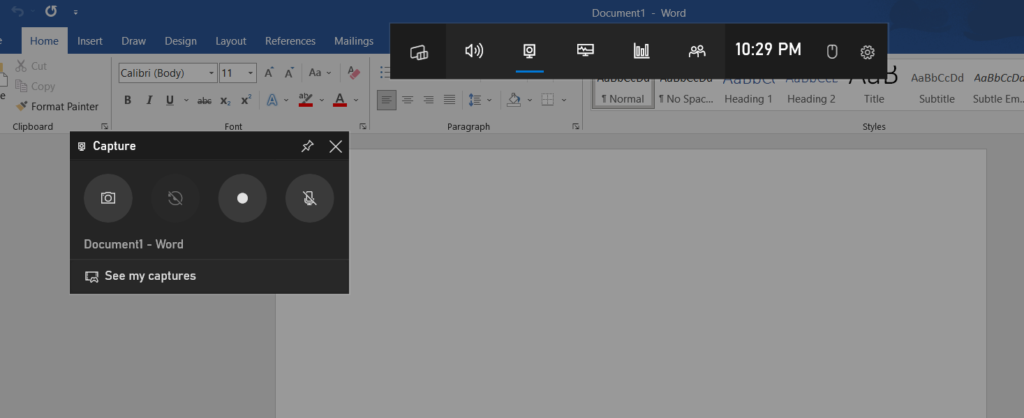
You can use the Game bar to capture a screenshot, hit the Windows key + G key to open the Game bar. Click the screenshot button in the Game bar. This will directly save the snap to a location on your machine. You will be able to see all the captures (tap See my captures)

Conclusion
I have tried to explain some of the easiest way to capture your screen .
Remember, all these methods will work in both the Operating system (windows 10 and Windows 11)
We understand that you might have burning questions about the world of screenshotting. Please feel free to ask and I would like to hear back from all of you, please comment and suggest if there is any improvement is needed
Congratulations, tech Souls! You’ve reached the end of this epic journey through. I have covered some of the easiest techniques, empowering you to capture, annotate and share screenshots like a pro. Remember, screenshotting is not just a skill; it is a gateway to improve productivity, efficient communication, and problem-solving power.


[…] through either of the above mentioned steps to complete the recording process.Also Read our post on Screenshot on Windows Happy Learning […]