Google provides a hidden settings page in Chrome, its advanced DNS (Domain Name System) management tools that help troubleshoot network issues. If you’ve ever faced slow browsing, website errors or DNS-related issues in Google Chrome, you just need to open a Google Chrome tab and enter the URL chrome.//net-internals/dns.
But what exactly is it? Why is it important? And how can you use it to fix your browsing problems? We will explore everything you need to know about chrome://net-internals/dns, and how you can use it to improve your internet experience.
What is DNS?
DNS (Domain Name System) is like the phonebook of the internet. Instead of remembering complicated IP addresses (like 192.168.1.1), DNS translates human-friendly domain names (like google.com) into machine-readable IP addresses.
How Does DNS Work in a Browser?
When you type a website address into Chrome, it:
- Checks the local DNS cache to see if it already knows the IP address.
- Sends a request to a DNS server if the IP isn’t stored.
- Receives the correct IP address and loads the website.
Why Does Chrome Store DNS Data?
Chrome stores DNS data temporarily to speed up browsing. By caching DNS responses, Chrome avoids unnecessary lookups, reducing page load times. However, sometimes outdated or incorrect DNS cache entries can cause issues.
Steps to Open the DNS Settings in Chrome
- Open Google Chrome.
- In the address bar, type chrome://net-internals/dns and press Enter.
- You will now see Chrome’s internal DNS settings page.
What You’ll See on the Page
- DNS Lookup: A tool to manually check DNS resolutions.
- Host Resolver Cache: Shows cached DNS entries.
- Clear Host Cache Button: Used to flush DNS cache.
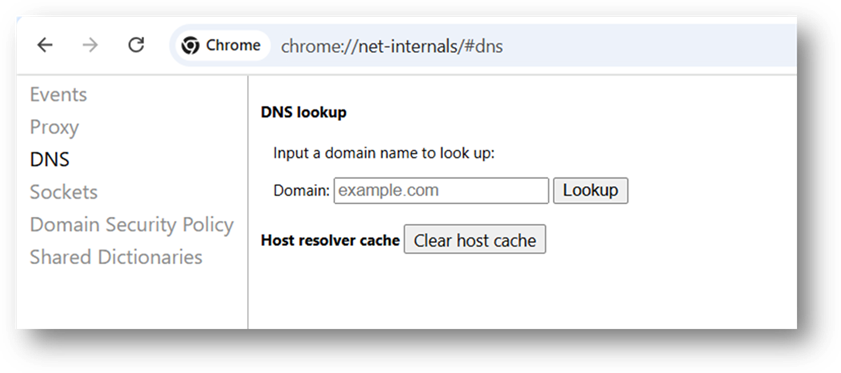
1. DNS Lookup
This tool lets you check how Chrome resolves domain names. You can enter a website address and see its corresponding IP address.
2. Host Resolver Cache
This section shows all cached DNS entries stored by Chrome. If a website isn’t loading properly, an incorrect DNS cache entry might be the cause.
Step-by-Step Guide to Clearing DNS Cache
- Open Google Chrome.

- Type chrome://net-internals/dns in the address bar.

- Click the “Clear host cache” button.

- Restart your browser for the changes to take effect.
Benefits of Clearing DNS Cache in Chrome
- Fixes Website Errors: Sometimes, outdated cache causes sites to load incorrectly.
- Improves Browsing Speed: Reduces the time needed for DNS lookups.
- Enhances Security: Prevents DNS spoofing attacks by clearing malicious entries.
Common Issues Related to DNS in Chrome
- DNS_PROBE_FINISHED_NXDOMAIN: The domain name could not be resolved.
- ERR_NAME_NOT_RESOLVED: The DNS lookup failed.
- Slow Browsing: Due to outdated or incorrect DNS cache entries.
Conclusion
The chrome://net-internals/dns page is a powerful tool for troubleshooting DNS-related issues in Google Chrome.
You can effectively manage DNS settings in Chrome, troubleshoot common issues and ensure faster and safer browsing.
FAQs
- What does chrome://net-internals/dns do?
It provides DNS management tools to view, troubleshoot and clear DNS cache in Chrome. - How often should I clear my DNS cache?
Clearing it every few weeks can help prevent outdated DNS records. - Does clearing DNS cache delete browsing history?
No, it only removes stored DNS records, not your browsing history. - Can changing DNS servers improve internet speed?
Yes, using a faster DNS server can reduce lookup times and enhance speed. - Is DNS over HTTPS (DoH) enabled by default in Chrome?
It depends on your settings, but you can manually enable it for better security.