If you are running any business or in a teaching profession, you might come across a situation where you need to collect feedback or conduct survey. Google Forms is one of the most versatile and user-friendly tools to create surveys and it is completely free. You might be a beginner in technology area or someone looking to refine your skills, this guide will walk you through how to create a survey in Google Forms efficiently. Let us deep dive into the process and learn the best practices.

In This Guide
Why Should You Use Google Forms for Surveys?
It is essential to understand why Google Forms is a top choice for surveys around the globe. Here are some benefits:
- User-Friendly Interface: You don’t need to be tech-savvy to use it.
- Completely Free: There are no hidden costs, making it accessible to everyone.
- Customizable Options: Add themes, images and videos to personalize your survey.
- Real-Time Data Collection: Get responses instantly and access data in Google Sheets for analysis.
- Cross-Platform Compatibility: Works seamlessly on desktops, tablets and mobile devices.
Steps to Create a Survey in Google Forms
Creating a survey in Google Forms is straightforward. Follow the steps below to create your survey from scratch.
1. Access Google Forms
Access the Google Form by visiting Google Forms. Please make sure that you are logged into your Google account to save your work.
Quick Tip: If you’re using Google Workspace for business or education, you’ll have additional features like templates and enhanced security options.
2. Start a New Form
Once you are on the Google Forms homepage, click on the blank form with a “+” icon to start creating your survey. Alternatively, you can choose from a variety of Google’s pre-made templates for surveys, quizzes, feedback forms and many more.
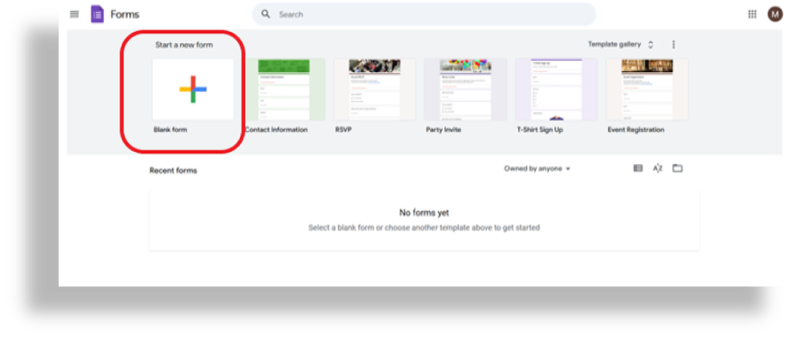
Pro Tip: If you’re new to Google Forms, experimenting with templates can save time and inspire ideas for structuring your survey.
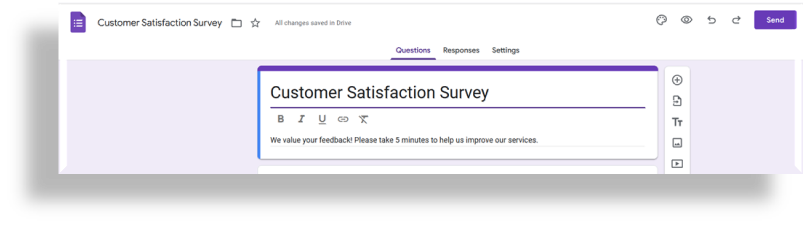
3. Give Your Survey a Title and Description
At the top of the form, click on “Untitled Form” and type in your survey’s title. Add a description below to explain the purpose of the survey to your respondents.
- Example Title: Customer Satisfaction Survey
- Description: “We value your feedback! Please take 5 minutes to help us improve our services.”
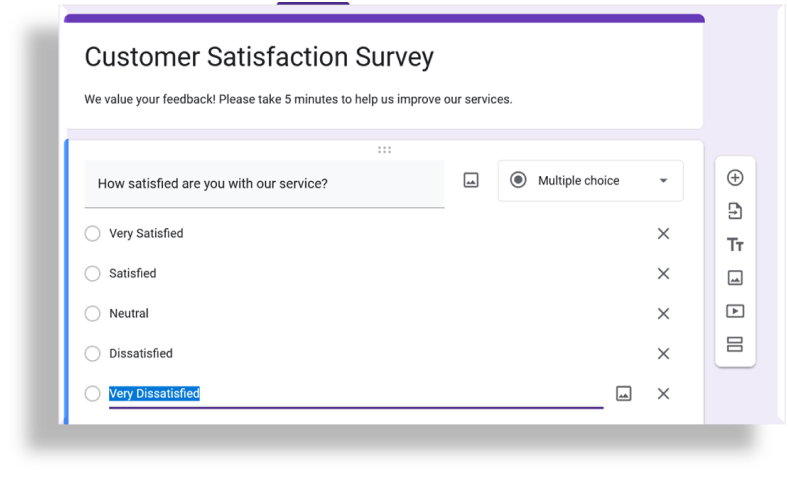
4. Add Questions to Your Survey
Google Forms allows you to add a variety of question types. Click on the “+” button to add your first question. You can choose from the following formats:
- Multiple Choice: Best for single-answer questions.
- Checkboxes: Ideal for questions with multiple correct answers.
- Short Answer: Perfect for brief text responses.
- Paragraph: Use this for detailed feedback.
- Dropdown: Great for creating a compact list of options.
- Example Question:
- Type: Multiple Choice
- Question: “How satisfied are you with our service?”
- Options: Very Satisfied, Satisfied, Neutral, Dissatisfied, Very Dissatisfied
- Type: Multiple Choice
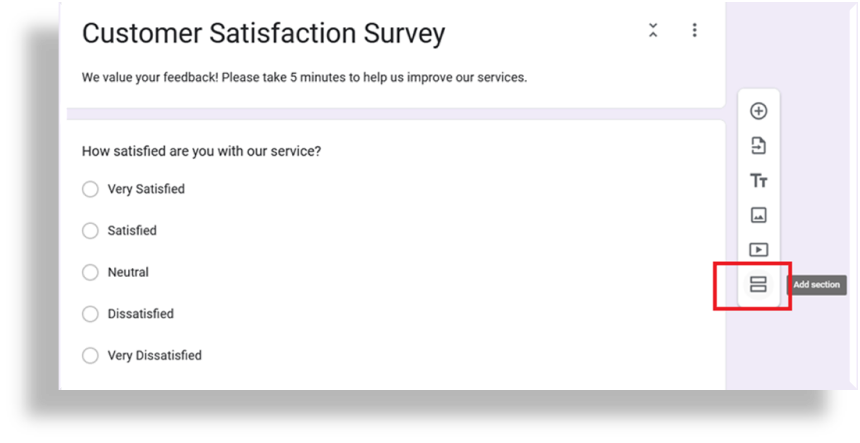
5. Organize Your Questions into Sections
For longer surveys, consider grouping related questions into sections. Click on the “Add Section” icon to divide your survey into logical parts.
- Example Sections:
- Personal Information
- Service Feedback
- Suggestions for Improvement
This ensures your survey remains structured and user-friendly.
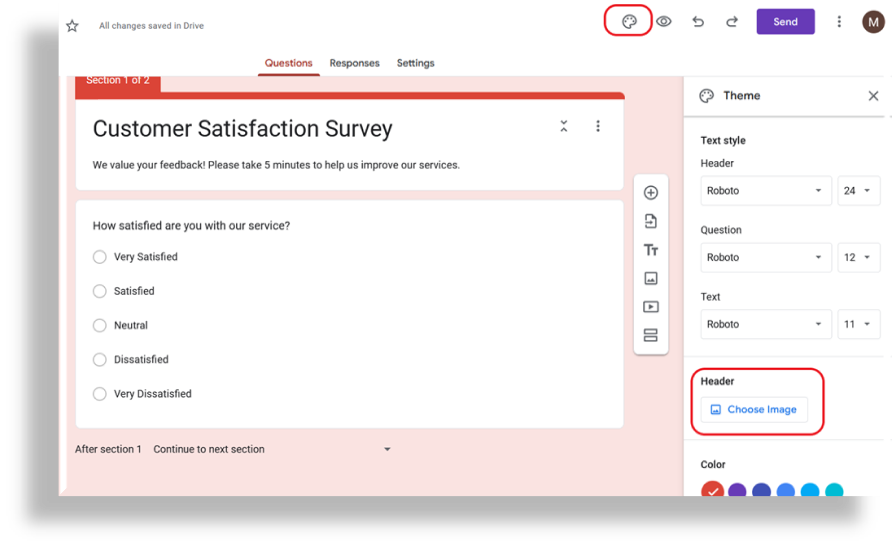
6. Customize Your Survey Design
Make your survey visually appealing by customizing the theme. Click on the “Palette” icon at the top and choose a color or background. You can also upload an image to enhance branding.
Pro Tip: Use your company’s logo or a relevant image to create a professional impression.
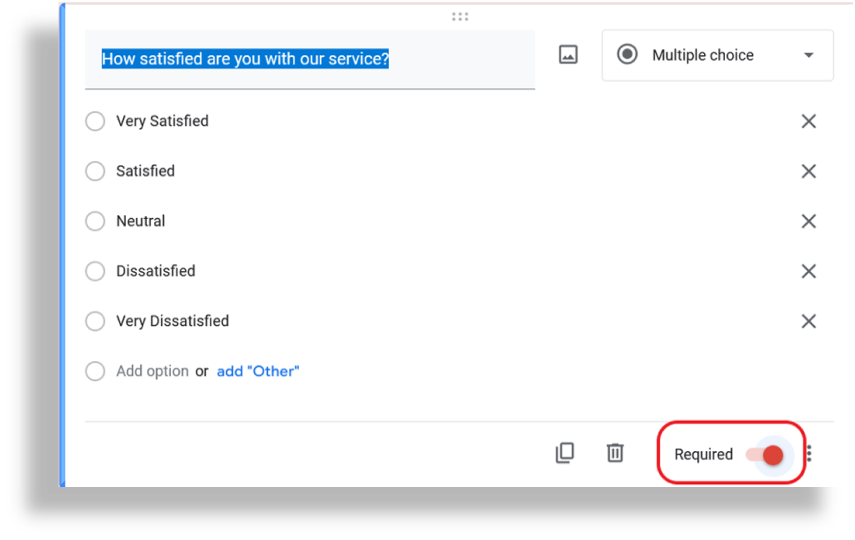
7. Enable Required Questions
To ensure respondents answer critical questions, toggle the “Required” button at the bottom of each question. This prevents incomplete responses and ensures accurate data collection.
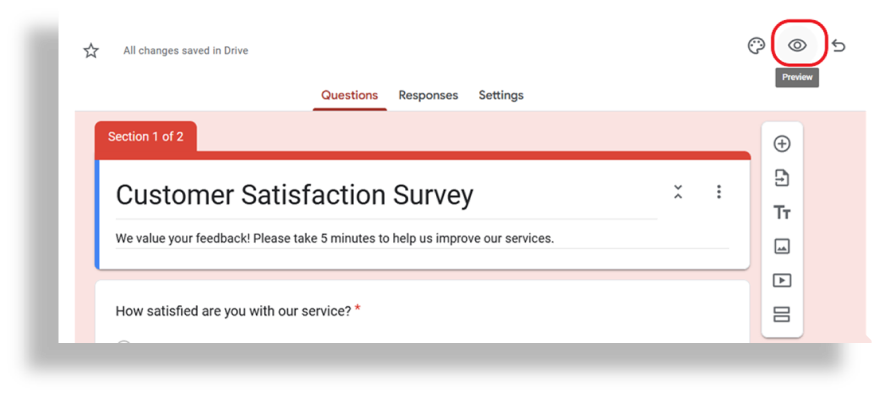
8. Preview Your Survey
Before sharing your survey, preview it to see how it appears to respondents. Click on the “Eye” icon at the top to view your form in action. Check for any errors or formatting issues.
9. Share Your Survey
If you are satisfied, it’s time to share your survey to the recipients. Click on the “Send” button at the top. Google Forms provides multiple sharing options:
- Email: Enter the recipients’ email addresses.
- Link: Copy the survey link and share it via social media, messaging apps, or websites.
- Embed Code: Add the form directly to your website or blog.
- Pro Tip: Shorten the survey link using tools like bit.ly to make it more user-friendly.
10. Collect and Analyze Responses
As responses start rolling in, access them by clicking on the “Responses” tab at the top. You can view them in summary charts or open them in Google Sheets for detailed analysis.
Pro Tip: Use Google Sheets formulas or pivot tables to gain deeper insights into your survey data.

Best Practices for Creating a Google Forms Survey
To make your survey effective and engaging, follow these tips:
- Keep It Short and Sweet: Avoid lengthy surveys to ensure higher completion rates.
- Ask Clear Questions: Avoid jargon and ambiguity to get precise responses.
- Use Logic Jumps: Utilize the “Go to section based on answer” feature to guide respondents through relevant questions.
- Test Your Survey: Share it with colleagues or friends for feedback before going live.
- Ensure Privacy: Inform respondents about how their data will be used and secure sensitive information.
You May Like To See Fix Blue Screen of Death
Common Uses for Google Forms Surveys
Google Forms is incredibly versatile and can be used for:
- Customer feedback
- Employee satisfaction surveys
- Event registrations
- Academic research
- Quizzes and assessments
Final Thought
Creating a survey in Google Forms is simple, efficient and highly customizable. By following the steps and tips outlined in this guide, you can create a professional survey to meet your needs.
So, what are you waiting for? Start building your survey today and unlock valuable insights for your projects!